Setting up Taboola and MGID from zero: accounts, pixels, conversion rules and landing pages
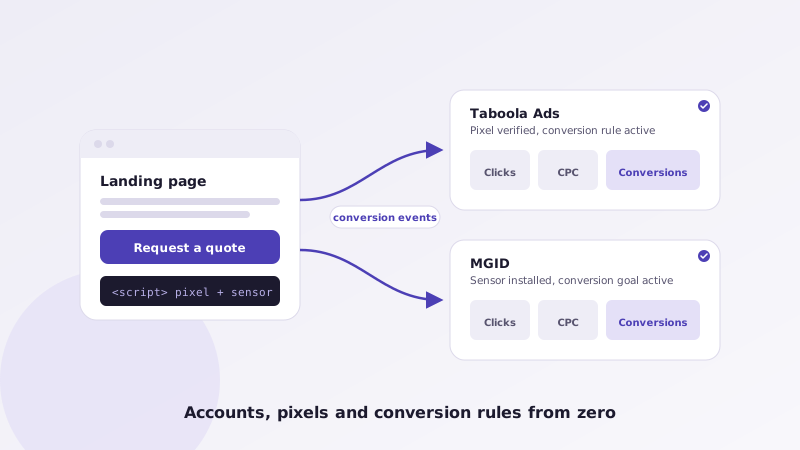
Most of the expensive problems in native advertising are setup problems in disguise: an account under someone's personal email, a pixel that fires twice, a conversion rule that counts page views as leads, a landing page rejected on the day of launch. This guide walks through the order we use to set up Taboola Ads and MGID for a business starting from nothing, so the first campaign spends on learning rather than on fixing.
Step 1: Define the conversion before you open anything
Decide, in writing, what a conversion is. For a lead business it is usually a form submission that lands on a thank-you page, and possibly a phone call. For e-commerce it is a purchase, with order value. For a subscription or app it is a trial start or an install. Also decide what you will track as a secondary signal, such as reaching the offer section of a pre-lander or clicking through to the product page, because in the first weeks you will have far more of these than you have sales.
Give every event a name you will use everywhere: in GA4, in the Taboola conversion rule, in the MGID conversion goal and in your dashboard. Agree on where the value comes from and whether it is fixed or dynamic. This document becomes the specification for every later step and saves hours of confusion when reports disagree.
Step 2: Open the Taboola Ads account the right way
Register the Taboola Ads account under the business name with a company email address, not an employee's personal login. Complete the business details and add a company payment method. Then add your agency or team members as users with the appropriate roles, so access can be revoked without losing the account. Taboola's own documentation on account structure, billing and policies lives in the Taboola Help Center, and it is worth reading the advertising policies before the first creative is written.
Inside the account, set the defaults you want every campaign to inherit: country targeting (usually the United States), language, brand safety settings and any site or section blocks you already know you need. A short starter block list of publishers that do not fit your offer, built from category knowledge rather than data, is better than none.
Step 3: Open the MGID account
Create the MGID advertiser account under the business name, complete verification and add a company payment method. MGID reviews new advertisers and their first landing pages, so have the website and a draft pre-lander ready. Add team members as users rather than sharing one login. The MGID Help Center documents the advertiser dashboard, moderation rules and the sensor installation.
MGID calls a creative a teaser, a placement a widget and its tracking tag the sensor. Set your default geo, language and device targeting, and note that MGID lets you bid per widget with coefficients, which you will use heavily once data comes in.
Step 4: Install tracking through a tag manager
Create a GA4 property and a tag manager container if the business does not have them, and install the container on every page of the site and every landing page. Everything else goes through the container, which keeps tags versioned and testable.
Install the Taboola Pixel as a tag that fires on all pages, then create conversion rules in Taboola Ads for the events you defined: typically a URL-based rule for the thank-you page or an event-based rule fired by the form. Install the MGID sensor the same way and create matching conversion goals. In GA4, mark the same events as key events and add custom dimensions for network, site and creative so your analytics can be sliced the way the ad platforms slice their reports.
Test every event on a phone and a desktop using the platforms' own verification tools and the tag manager preview mode. Check for double firing, which inflates conversion counts and misleads Smart Bid later. Where the platform supports server-to-server or postback conversions, set them up for purchases and qualified leads; they survive browser restrictions better than pixel-only tracking and let you send a later qualification signal from your CRM.
Step 5: Landing pages that pass review and convert
Native landing pages have to satisfy two audiences at once: platform reviewers and skeptical readers on phones. For reviewers, the page needs a clear sponsored or advertorial label where the format calls for one, a visible privacy policy and terms, accurate claims with support, no fake news styling and no misleading urgency. Both networks reject pages that imitate editorial brands or make health and financial claims they cannot back up.
For readers, the page needs to load in about a second on a mobile connection, continue the story the headline started and reach the offer without friction. Build the pre-lander and the conversion page on your own domain, wire the forms to your inbox or CRM and send every completed form to a thank-you page so the conversion rule has a clean URL to match. Compress images, avoid heavy scripts and test on a real device, not just a browser emulator.
Step 6: The pre-launch checklist
Before the first campaign goes live, confirm each item. UTM conventions documented and applied to every landing URL, using the platforms' dynamic macros for site and creative IDs so analytics and ad reports line up. Separate campaigns for mobile and desktop on each network, because their economics differ. Manual CPC bids set conservatively for the learning phase, with Smart Bid or maximize conversions held back until there is conversion volume. Daily budgets capped at a level you can afford to spend on information. Block lists loaded. Conversion rules and goals verified as firing once. Creative and pages approved internally and submitted for review a few days before the intended start date, because review takes time.
Finally, write down the decision points: what click-through rate and cost per click you expect, when you will make the first block list pass and what cost per acquisition would trigger a change of angle. A setup done in this order usually takes two to three weeks, and it pays for itself in the first month of spend.
Key takeaways
- Write the conversion definition first; every account, pixel and report follows from it.
- Open Taboola Ads and MGID accounts in the business name with company billing, and add people as users.
- Run the Taboola Pixel, MGID sensor and GA4 through one tag manager container, and test for double firing.
- Landing pages need honest disclosures, policy pages, speed and a thank-you URL for conversion rules.
- Launch with device splits, manual CPC, capped budgets and starter block lists, and submit for review early.
Would rather have this set up for you? Account setup, tracking and landing pages are the first phase of every engagement we run, and the client owns all of it. Request a proposal and we will scope the setup for your business.